This space is to share fun preschool ideas and activities. I am also passionate about children exploring their outdoor surroundings. Thanks for stopping by to see the latest Adventure with the Kerr's!
RSS
Showing posts with label halloween. Show all posts

Thursday, November 11

Happy Halloween

During school time we planned a trick-or-treat so we could all go together as a class!


I loved all the colorful costumes!


We then went to see the neighbor's horses. Hh, for horse and Halloween!


For lunch we made mummy, cat, and spider pizzas!


Our costumes: chicken, pirate, lady love bug, and ski bum.


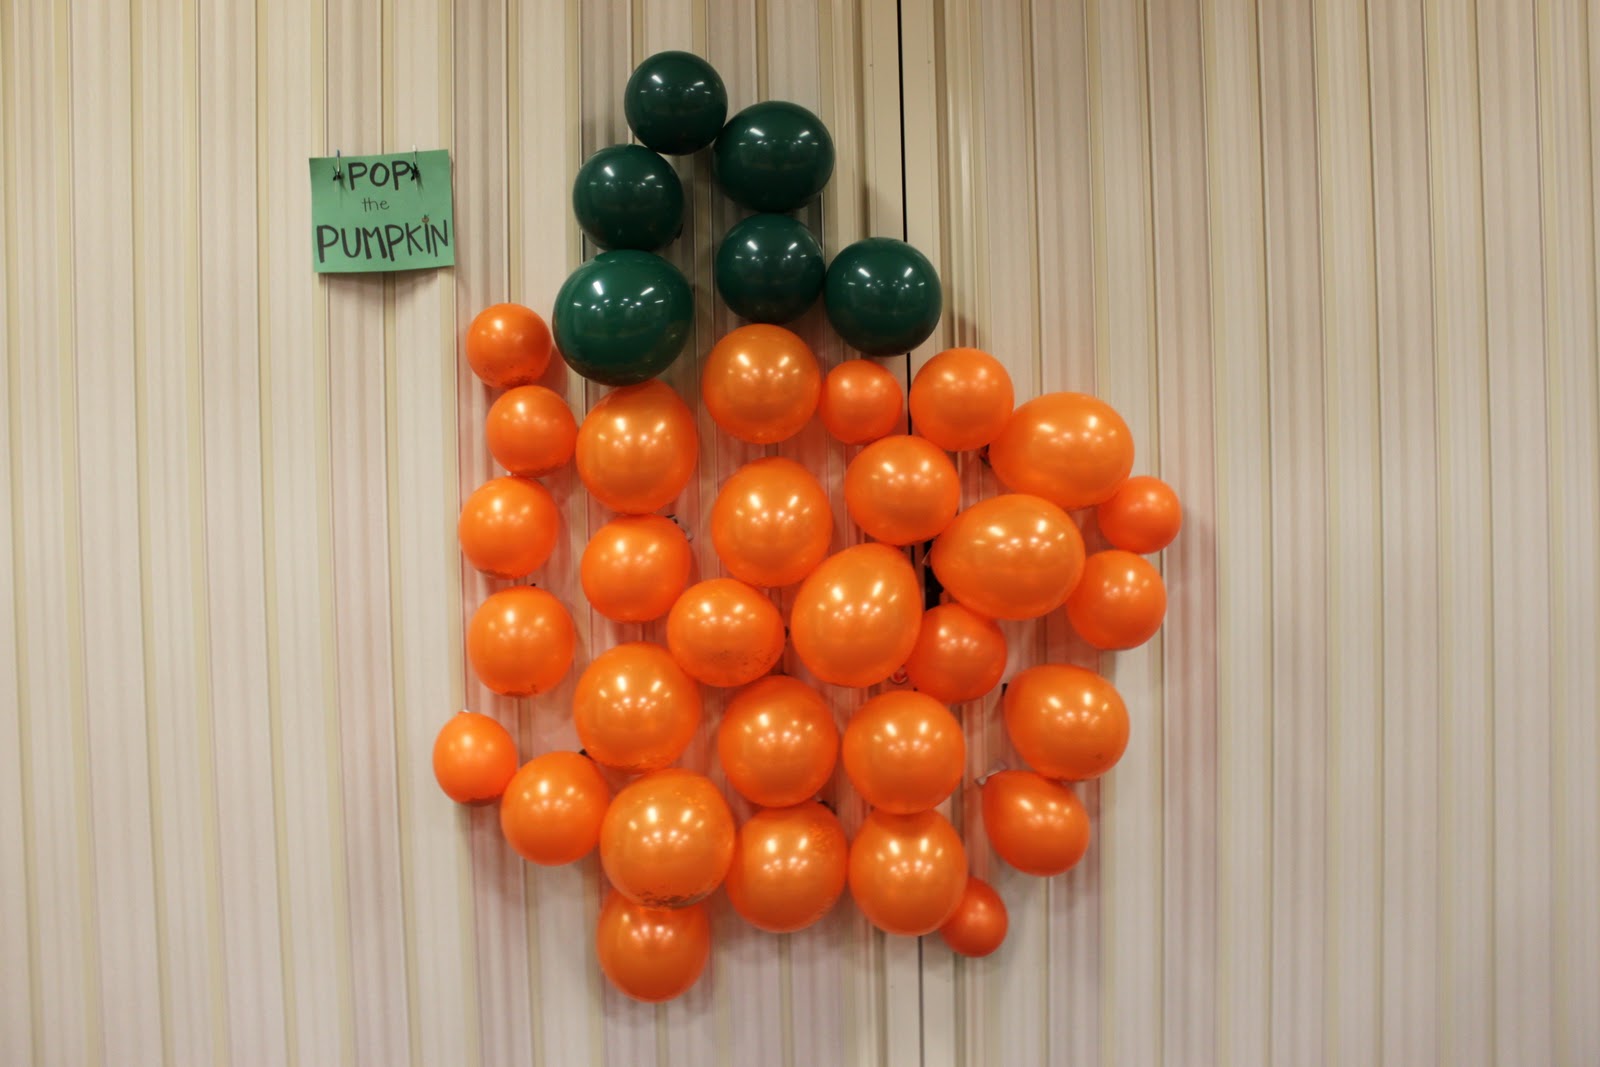
We then went to the church party where I helped out with a few games. We did pop the pumpkin!
I loved the idea from Martha, but did it with less 
materials and guess what, it worked great!!
Inside each balloon was confetti, candy, a spooky pin, or a prize winning ticket. Then we put the balloons up with duck tape. (After 4 hours it didn't look as nice as when we first put it up)


The classic fishing pond. 


I love this one of the lady love bug with all the confetti in the background!


 Munching on a few pieces of candy! (This same little boy had a headache and wasn't feeling well just 1 hour previous. I guess that's the power of a party and some candy.)


We went door-to-door trick or treating after the party and had a great time!


The counting of the loot!


*********************************

Then on Sunday we had a party to celebrate my friend's birthday. So obviously it was Halloween themed....


My husband Eli and I got a little excited about decorations food.


I loved these labels for our drinks!


I usually don't talk about how artsy and crafty my husband is, mainly because I like to think I have better ideas than his :) but these fun spiders were all his idea. (oh also the mice on the cheese and the silhouette pictures)


The birthday girl filling up her cup with some Black Death Tonic. (aka root beer)


Then it was time for some apple bobbing.


The dry ice inside the warm water was a weird sensory experience!


It was so weird in fact that I couldn't stop laughing about it!


We had a wonderful Halloween weekend!

Tuesday, October 26

spooky pictures


I saw tin foil paintings here and decided that we should  make some spooky pictures of our own today!


We used:
::foil
::metallic black paint
::a paintbrush and plate
::q-tips


This paintbrush already had some fun! 


Each person painted the black acrylic paint onto the foil. 


 Then used a q-tip to make the outline.


 Everyone at work!


The paint didn't take very long to dry. The great thing about the acrylic paint is that it will not flake off the tin foil. Now it's ready for some yarn to be hung up so it can fly!! 


Saturday, October 23

bats


As soon as I saw these bats at Filth Wizardry, I was so excited to dig into the massive pile of toilet paper rolls that I have been saving to make these!


This one was mine. 


River wanted his bat to have 3 eyes.


The whole bat family.


Here are the instructions.

We used black metallic acrylic paint, googly eyes, construction paper and of course the toilet paper roll. It was great fun!

Thursday, October 21

Easypeasy Halloween garland

 As soon as I saw this easypeasy fun Halloween garland at Twig and Toadstool I knew it would be the perfect decoration for us to do! The print outs can be found at The ToyMaker the third row down.

Rue painted the cat with markers and watercolors. River painted the skull, owl, and pumpkin with watercolors. I love the owl!


Wednesday, October 20

October Sensory Tub

 I know everyone has been posting what their sensory tubs look like, so I thought hey I might  as well post mine.


*I used rice with a few black beans for color. (Truthfully I didn't want to spend $5 on 5 pounds of black beans, so instead paid $3 for 6 pounds of rice.)

*orange spiders
*black bats
*a few white skull heads 
*stretchy skeletons.
*stretchy skeletons cut into pieces
*googly eyes
*glow in the dark snakes


The hit of the tub were the glow in the dark snakes! We had a glow in the dark party in the laundry room while we ate our spooky snacks. I totally felt like I was four again!


Monday, October 11

Pumpkin seed face


One way to use pumpkin seeds is to make funny, scary, or silly Jack-o-lantern faces!


All you need:
pumpkin
pumpkin paper cut outs
glue, glue, and probably more glue


The adventurers each took a turn scooping out seeds.


They put the seeds into a large pan. 


At the art table we had the pumpkin cut outs
ready to be glued upon.
(The adventurers all went crazy with the glue. 
We are talking hours upon hours to really dry!)


River made this one... he said it's a  scary werewolf! 


Friday, October 8

Pirate Popcorn Pumpkin Patch

I, the great pirate Poppy wanted my fellow pirates to find some the the treasures that got caught in the Popcorn Pumpkin Patch.


 The treasures were much harder to find, then what ye see here.


Each Pirate used their plump, plastic, pumpkin to fill it with the treasures to be found! 


 Each pirate took a partner, so 2 treasure seeking pirates per 
popcorn pumpkin patch. 
(This way there was a more equal chance to all receive the same amount of treasures.)


 The pirates squealed with delight as they found all the treasures! 
Pirate coins, pumpkins, skull heads, monkeys and pebbles.


I have done quite a few sensory bins and this by far was the most fun for all the adventurers. They loved been able to keep the small treasures they put into their own container. They kept asking me if they could keep the treasures..can you tell they are use to just sorting everything out to play with not to keep? Plus having eatable pumpkins and eatable sensory fill (popcorn) added an additional element of fun!


Here is a pic of the eatable pumpkins so you know what to look for if you have never bought them...


I really do love Fall themed activities!


Thursday, October 7

Jack-o-lantern made with Ice


I bought a pumpkin tray at the dollar tree knowing I would use it for some activity during our P for Pumpkin week. I decided that the adventurers would have fun making a jack-o-lantern with frozen ice cubes on paper plates.


I added food coloring to water to make 
the orange ice pumpkins. 


 I made about 30 ice cubes and put them in the plastic bowl to have them all ready for art time.  Then I pulled them out of the freezer about 25 mins prior to art time.


I drew the jack-o-lantern face with a permanent marker on the paper plate.


 I had the adventurers start with 1 cube, but since I am an adult I thought I could handle 2! :)


River rotating his pumpkin ice cube around on his colorful face! It was also fun to hold the ice pumpkin to color the plate.


The coloring was light.


When it was finished drying (make sure you have plenty of paper plates under the wet one!) I glued on the green stem!


Related Posts with Thumbnails